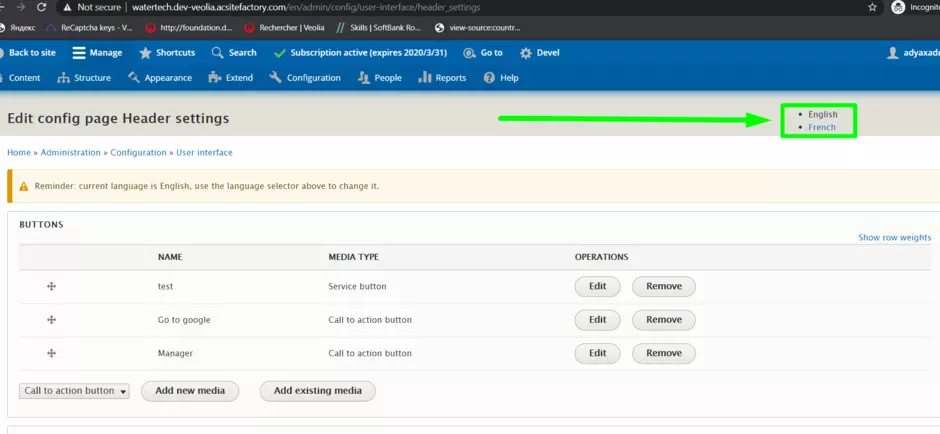
Access Configuration > User Interface > Header Settings
Adding a Header button
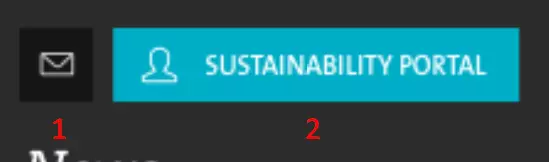
Two kind of Header buttons can be used: a Service button (1) or a Call to Action button (2).
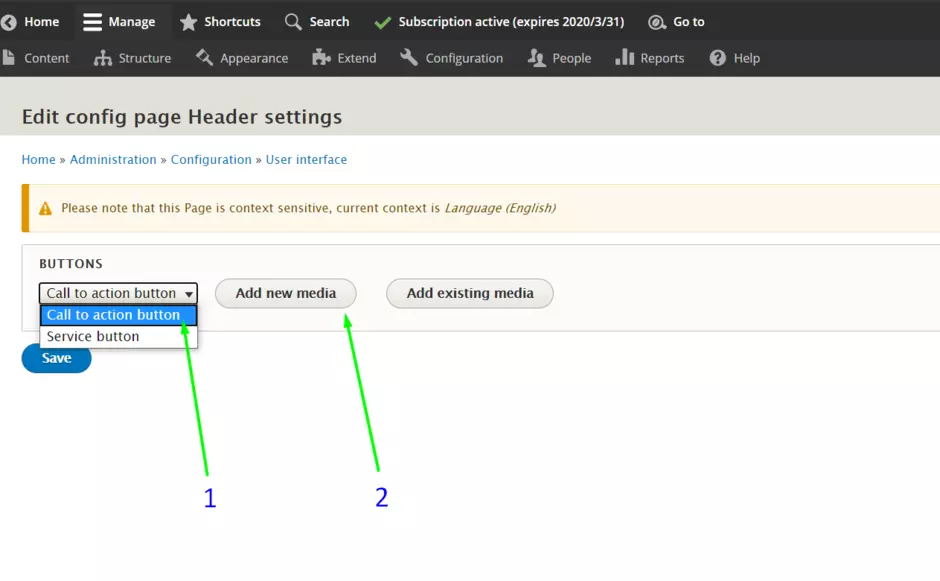
CTA button
- In the buttons list, select [Call to Action button]
- Click on the [Add New Media]
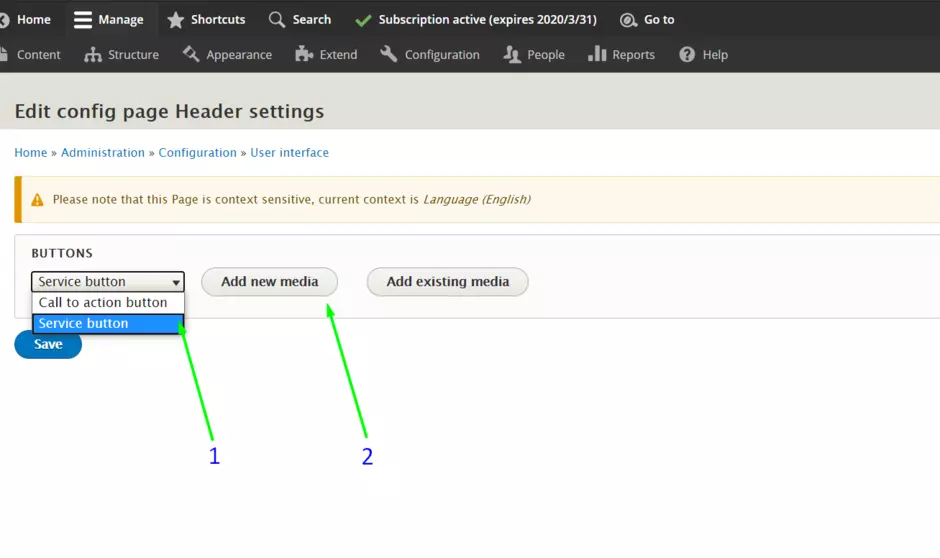
Service button
- In the buttons list, select [Service button]
- Click on the [Add New Media]
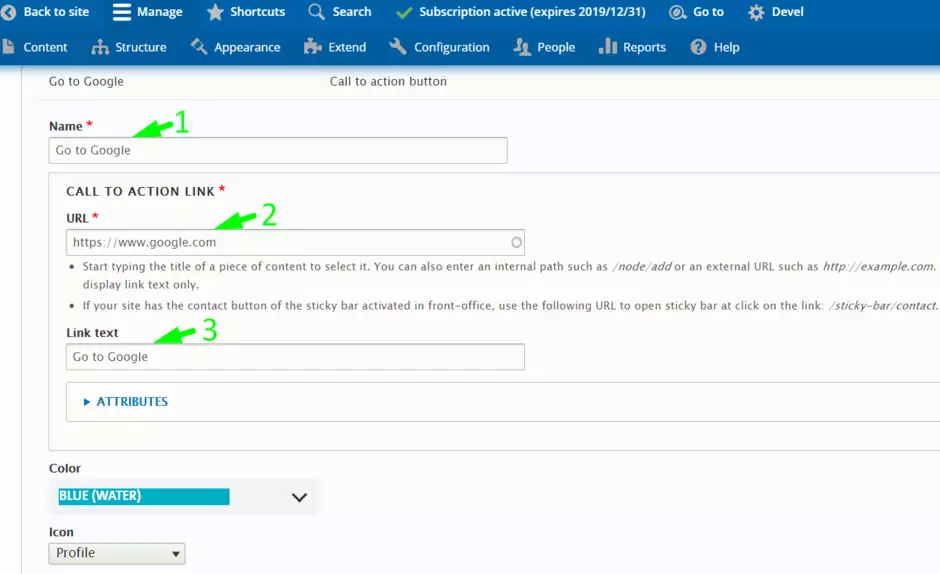
Configuring a CTA Button
- First give a name for the button
- Secondly enter the URL where you want to direct the Users
- URL can be internal - means within the site;
- URL can be external - for example https://www.google.com;
- Then enter a "Link text" - this text will be used as a Title of a button
- Next select a color and Icon for the button
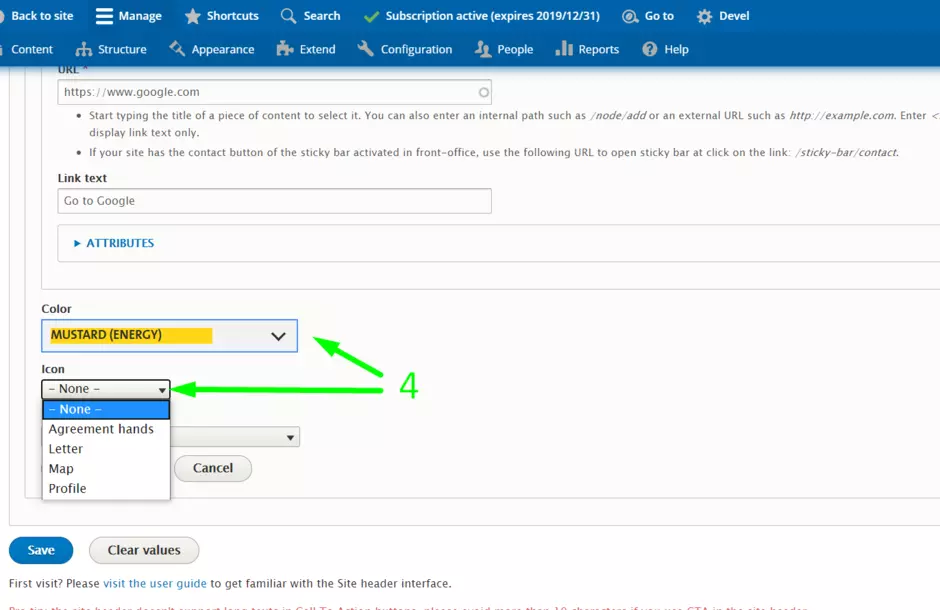
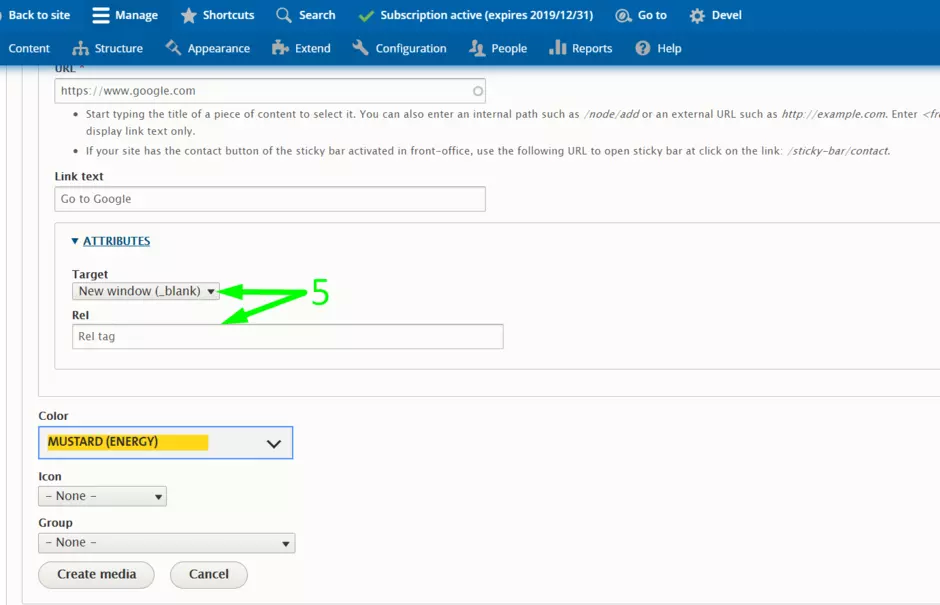
- In addition, you may add attributes for the button: "open page in new window" or "Rel" tag
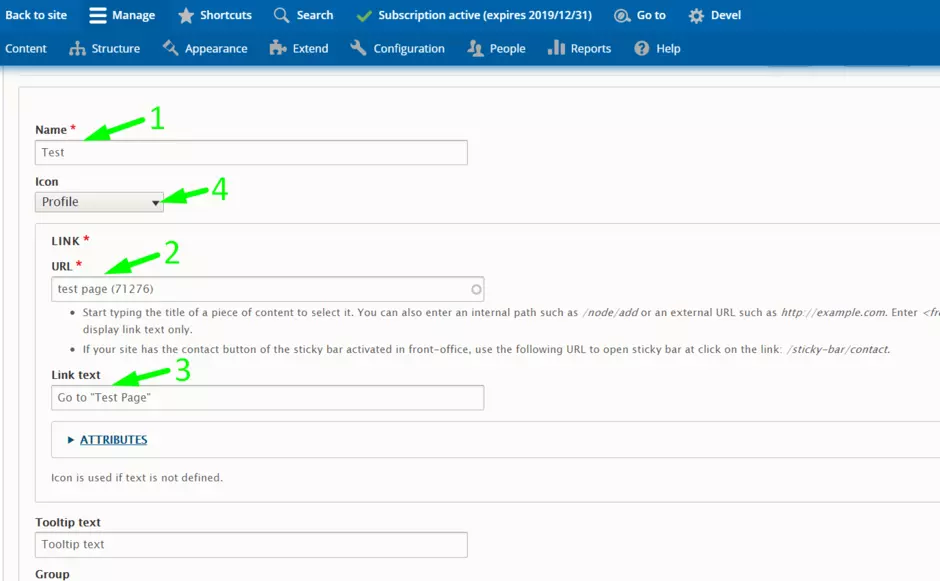
Configure a Service button
- First give a name for the button
- Secondly enter the URL where you want to direct the Users
- URL can be internal - means within the site;
- URL can be external - for example https://www.google.com;
- Then enter a "Link text" - this text will be used as a Title of a button
- Next select an Icon for the button
- In addition, you may add attributes for the button: "open page in new window" or "Rel" and "Class" tags

- Tooltip field - this is a text appeared on hover, when User move mouse cursor over the button; please see picture Example.
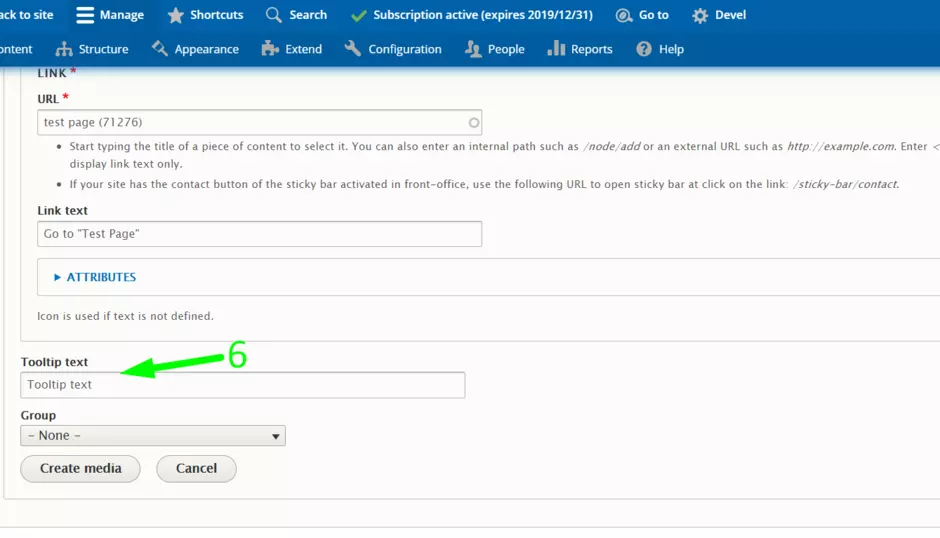
Example: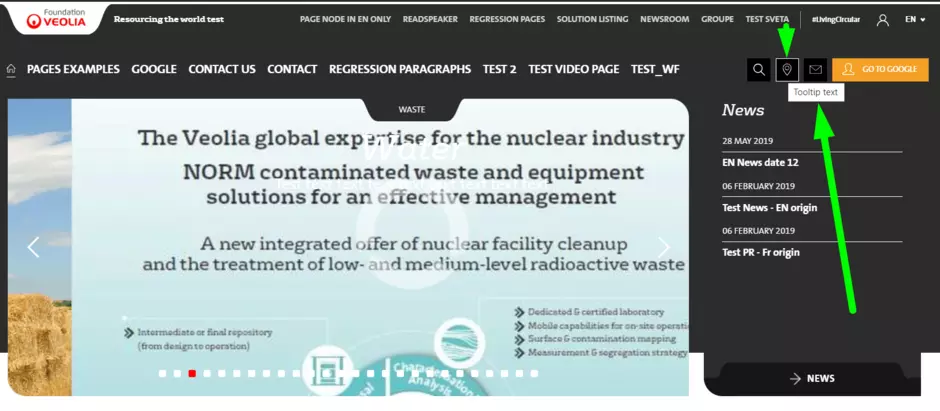
Translate buttons
Header buttons are not translatable, you have to create new ones on each language of your site.
- Find the "Language" tab
- Click on the desired Language
- Start creating the buttons
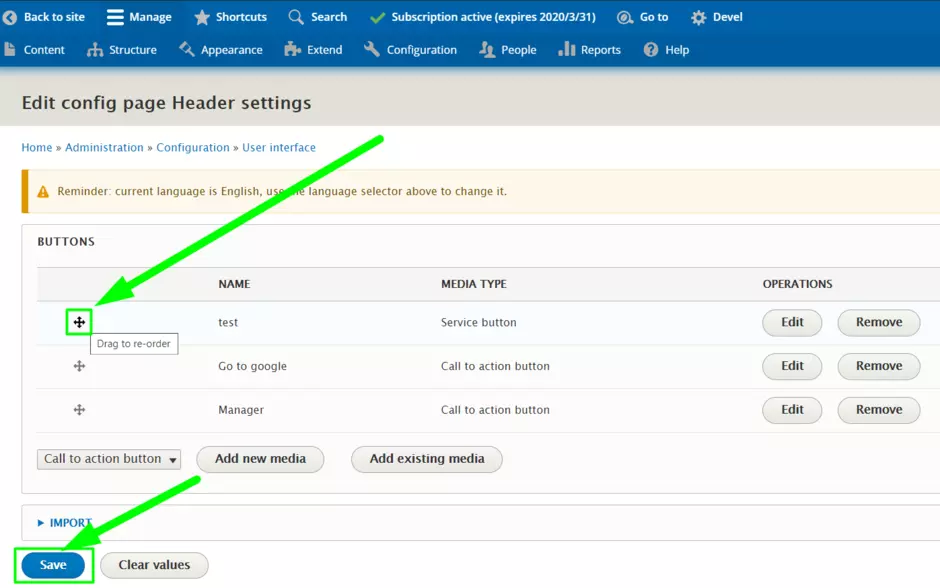
Changing the order of buttons
- Click and Hold "Drag the order" button
- Move it do desired place
- Please don't forget to Save the changes