This procedure allows you to showcase and manage all upcoming events or activities.
It involves two steps:
Step 1: create an "Event" page
- Access the Event Page Creation Interface:
- Click on "Content" in the admin menu.
- Select "Add Content" and choose "Event".
- Add the title of this page.
- Customize the Hero Banner:
- Add a Title.
- Add an image or video at the top of the page. Include text and a CTA button if needed.
- Use the Content Push Section:
- Add a title and short description to display on your hub page.
- Set Event Dates:
- Specify the start and end dates for the event.
- Add a Detailed Event Description:
- Provide comprehensive information about the event by using the text component.
- Use rich formatting to include text, images, videos, GIFs, or additional CTA buttons.
- Save Your Changes and change the status to "Published".


Step 2: Create a "hub page" for events
Create a page by using "Page" content type
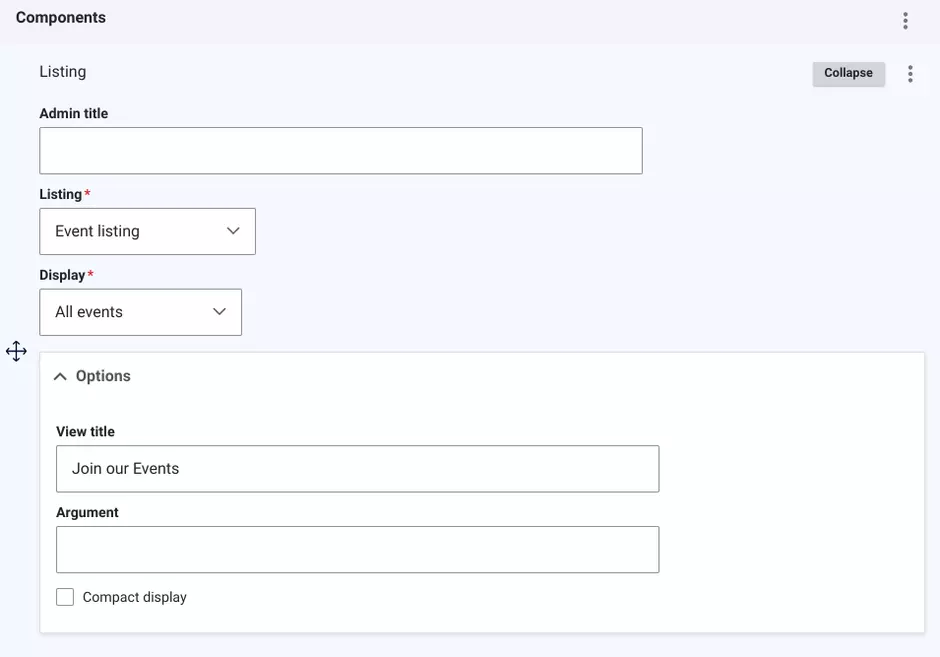
Add a new Listing component
Select the "Event listing"
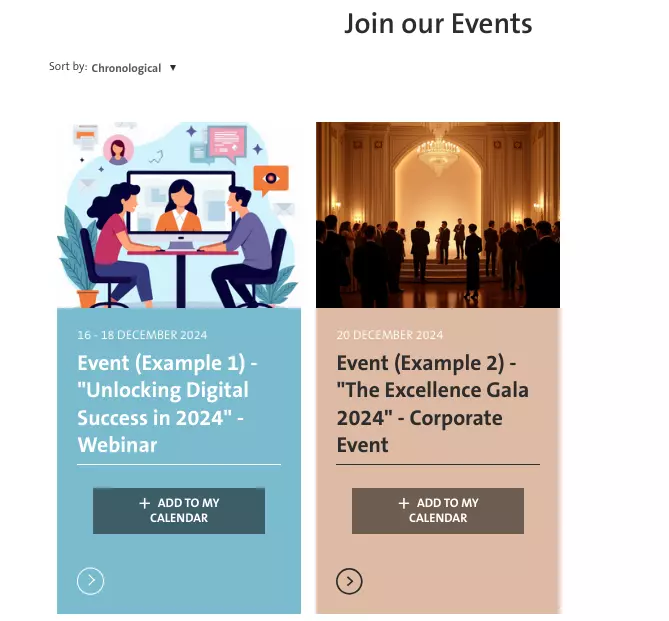
Choose Display option:
- "All events" to display every event.
- "Only last event" to show the most recent event.
- "Only upcoming events" to display future events.
Expand the Options menu to customize additional settings.
- Add a title above all the listed elements, if desired.
- Enter a subtitle in the "Arguments" field for extra context.
- Enable the "Compact display" option to change the format:
- The layout becomes more condensed.
- Content push elements (image, title, description) will not appear.
- Events are displayed as cards, offering a simpler visual.
Preview the page to verify the display and layout.
Save the changes to publish the event hub page.